making masks for hospitals!
- Katie Mulry

- Mar 28, 2020
- 4 min read
If you’ve been keeping up with the news lately, you’ve probably noticed reports about mask shortages in hospitals. And while more are being made and ordered every day, and while some different American companies like Hanes are repurposing their equipment to make more masks, it’ll be a few weeks before hospitals have what they need.
But in the meantime, my grandmother told me, anyone at home can sew masks to help! (You can also 3D print masks if you have access to a 3D printer. Scroll to the bottom for the link!)
That’s been one of my projects this week. I figured I’d share a little about that! If you’re looking for the pattern, here’s a link to the one I used.

This is a super quick and easy sewing project. I’m not amazing at sewing (and I have a temperamental sewing machine) but I was able to figure these out pretty quickly, and I can sew one in less than ten minutes now. The first one you do is definitely the most confusing, but it really only took one to get the hang of it!
why sew masks? (do they actually get used?)
After the CDC updated its website to recommend using cloth bandanas in a severe shortage, people around the country started sewing masks instead. Cloth masks are not as effective as surgical masks and are not a replacement for the N95, but they actually are being used.
These are just the stories I’ve heard: a friend’s mom who’s a doctor used the same mask for two weeks (you’re supposed to replace them every four/five hours.) Doctors caring for coronavirus patients in New York reusing N95s for days on end. Funeral homes needing masks, too, but being largely forgotten in the press to get hospitals what they need.
Nobody wants to use cloth masks, but the fact of the matter is that there’s not much else. Some healthcare professionals use the masks on top of the surgical grade masks or the N95s to prolong their lives— the cloth masks provide an extra barrier of protection for the more powerful and valuable masks.
I really did not think hospitals would actually want sewn masks, but even reading the comments on the YouTube tutorials I watched changed my mind. All sorts of doctors and nurses were commenting saying they were making some for themselves to take to work!

what you need
The general mentality behind the homemade masks is that something is better than nothing. The point is just to make as many masks as quickly as possible. Here’s what you need!
cotton fabric (but anything works! old t-shirts, fabric scraps you already have, whatever!)
1/4 inch elastic, but people also use hair ties, and some patterns have a modification for cloth ties if you don’t have elastic.
wire (the most optional. I sewed wire into the nose of the mask so it can bend to fit people’s faces better, but the original pattern I used didn’t have this step. I used jewelry wire, but paper clips, bread bag ties, and other forms of wire work too!)
interfacing. I’m going to be honest, I didn’t know what this meant and didn’t have it, but if you know how to use it go for it.
scissors
pins
iron (also optional. A hair straightener could work for this purpose too! Ironing just makes the pleats lie nicer.)
sewing machine, or just a needle and thread
step 1: cut your cloth
Print out your pattern of choice or draw it out— the JoAnn tutorial gives both options! You’ll want to fold your fabric scrap in half, but if your scrap is too small to fold, feel free to use two different colors. Some hospitals like the two-colored masks because it allows people to know which side is the contaminated side. Cut out your fabric and sew the top (unfolded) part together. Make sure your pattern faces “right side in,” or the nice sides should be together during this step.

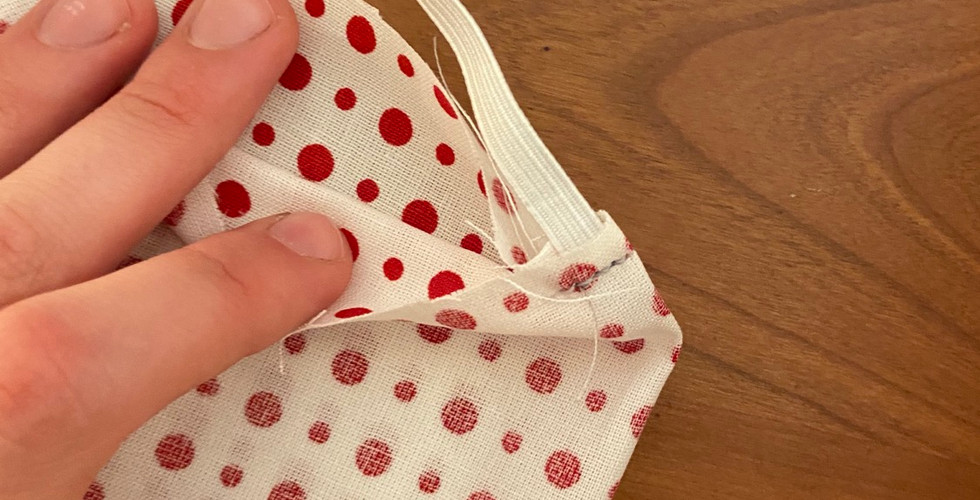
step 2: elastic
You’ll want to cut your elastic into 6 1/2” or 7” pieces (I did 6 1/2” and they were a little long, but everyone’s face is different.) Then you’re going to slip the ends of the elastic pieces into the gap created between the two folds of fabric and stitch them into place.


optional step: wire
If you have wire and feel confident in using the zig-zag stitch on your sewing machine, cut about a 3-inch piece of wire and place it in the middle of the stitched top of your mask. Use the zig-zag stitch to go over it and secure it in place. This will let whoever uses your mask bend it to fit around their nose and help secure it.

step 3: turn it inside out
The edges with the elastic should still be open. Flip the mask inside-out using one of these and grab your pattern again.

step 4: pleats
Using your pattern, follow the black lines to create and pin pleats. The JoAnn tutorial video does a really good job explaining this step! I pressed my pleats down with an iron before stitching over them.

step 5: finish and donate!
Clip the little extra threads left over and you’re done! Give it to someone you know in the healthcare profession, or mail it or drop it off at a hospital. Depending on your city, there may be a local organization collecting masks, so check that out too!

other options
So let’s say you’re not the best at sewing or don’t have the supplies. Maybe check your garage— see if you bought some masks from painting or something. My dad had an N95 from woodworking back there! If you’ve got something unused, definitely donate it. Mask Match is a group organizing that, so you can even set something up with your neighbors to donate together!
Another thing you can do, if you have a 3D printer, is print a mask! Here's a link for that.

Whichever mask method or pattern you use, I hope you have as much fun making them as I did! It’s so exciting to be able to help out, even in such a small way as this!
Stay safe and well!


Comments